
Why press a button when a machine can do it ?
It has been quite some time now that I bought a Yeelight ceiling light. But, I often forget to turn the lights off when I get out, or I would just like to get in without having to guess where I step till I reach the lights switch !
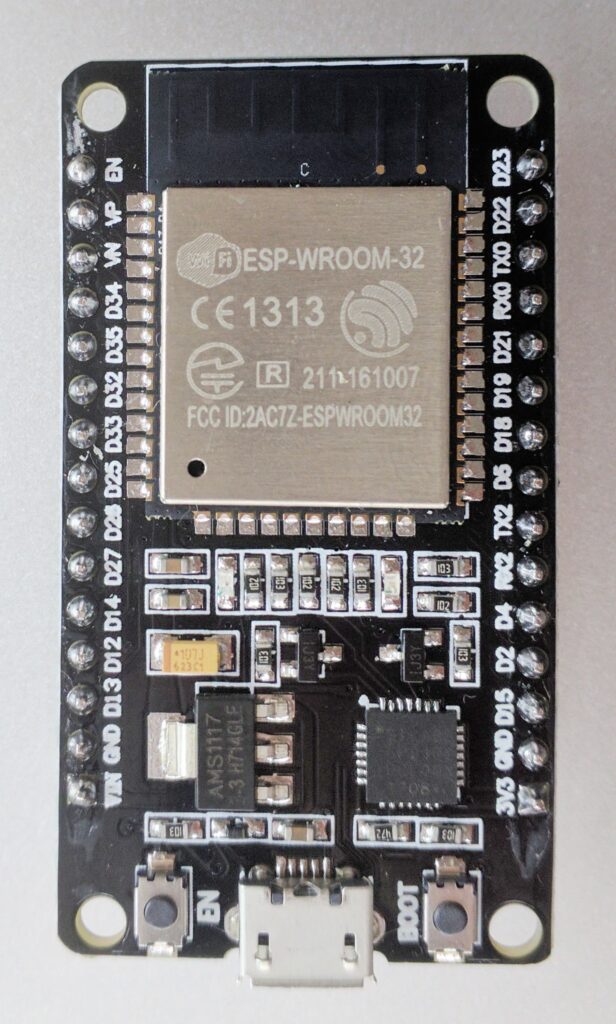
Hence, having played with an ESP32 quite often, I immediately thought about scanning for my wrist bracelet and turning on / off the lights when I get in / out. The principle is quite simple, you only need a Bluetooth low energy device that you always wear on you. The ESP32 detects when you are near your apartment, sends a signal either directly to your light or to a server. The lights then turn on / off automatically when the ESP32 detects that your “presence” state change.
Choosing the right BLE device and setting it up
I attempted such a system two years ago with JavaScript running on a raspberry pi. However, because I was wearing a Samsung galaxy watch S2 at the time, the process wasn’t reliable : you cannot set up these devices as always discoverable in BLE. It is good security practice to do so, except that in my case I didn’t want to. Just now that anyone can track you in a 20m radius. If you accept that, then follow through my explanation.
In my case I used a Xiaomi Mi Band 3 that I already use for sleep and running tracking. I always have it with me, its battery lasts more than a week and it is affordable. Furthermore, you can activate its “discoverability” in the “Mi Fit” app :
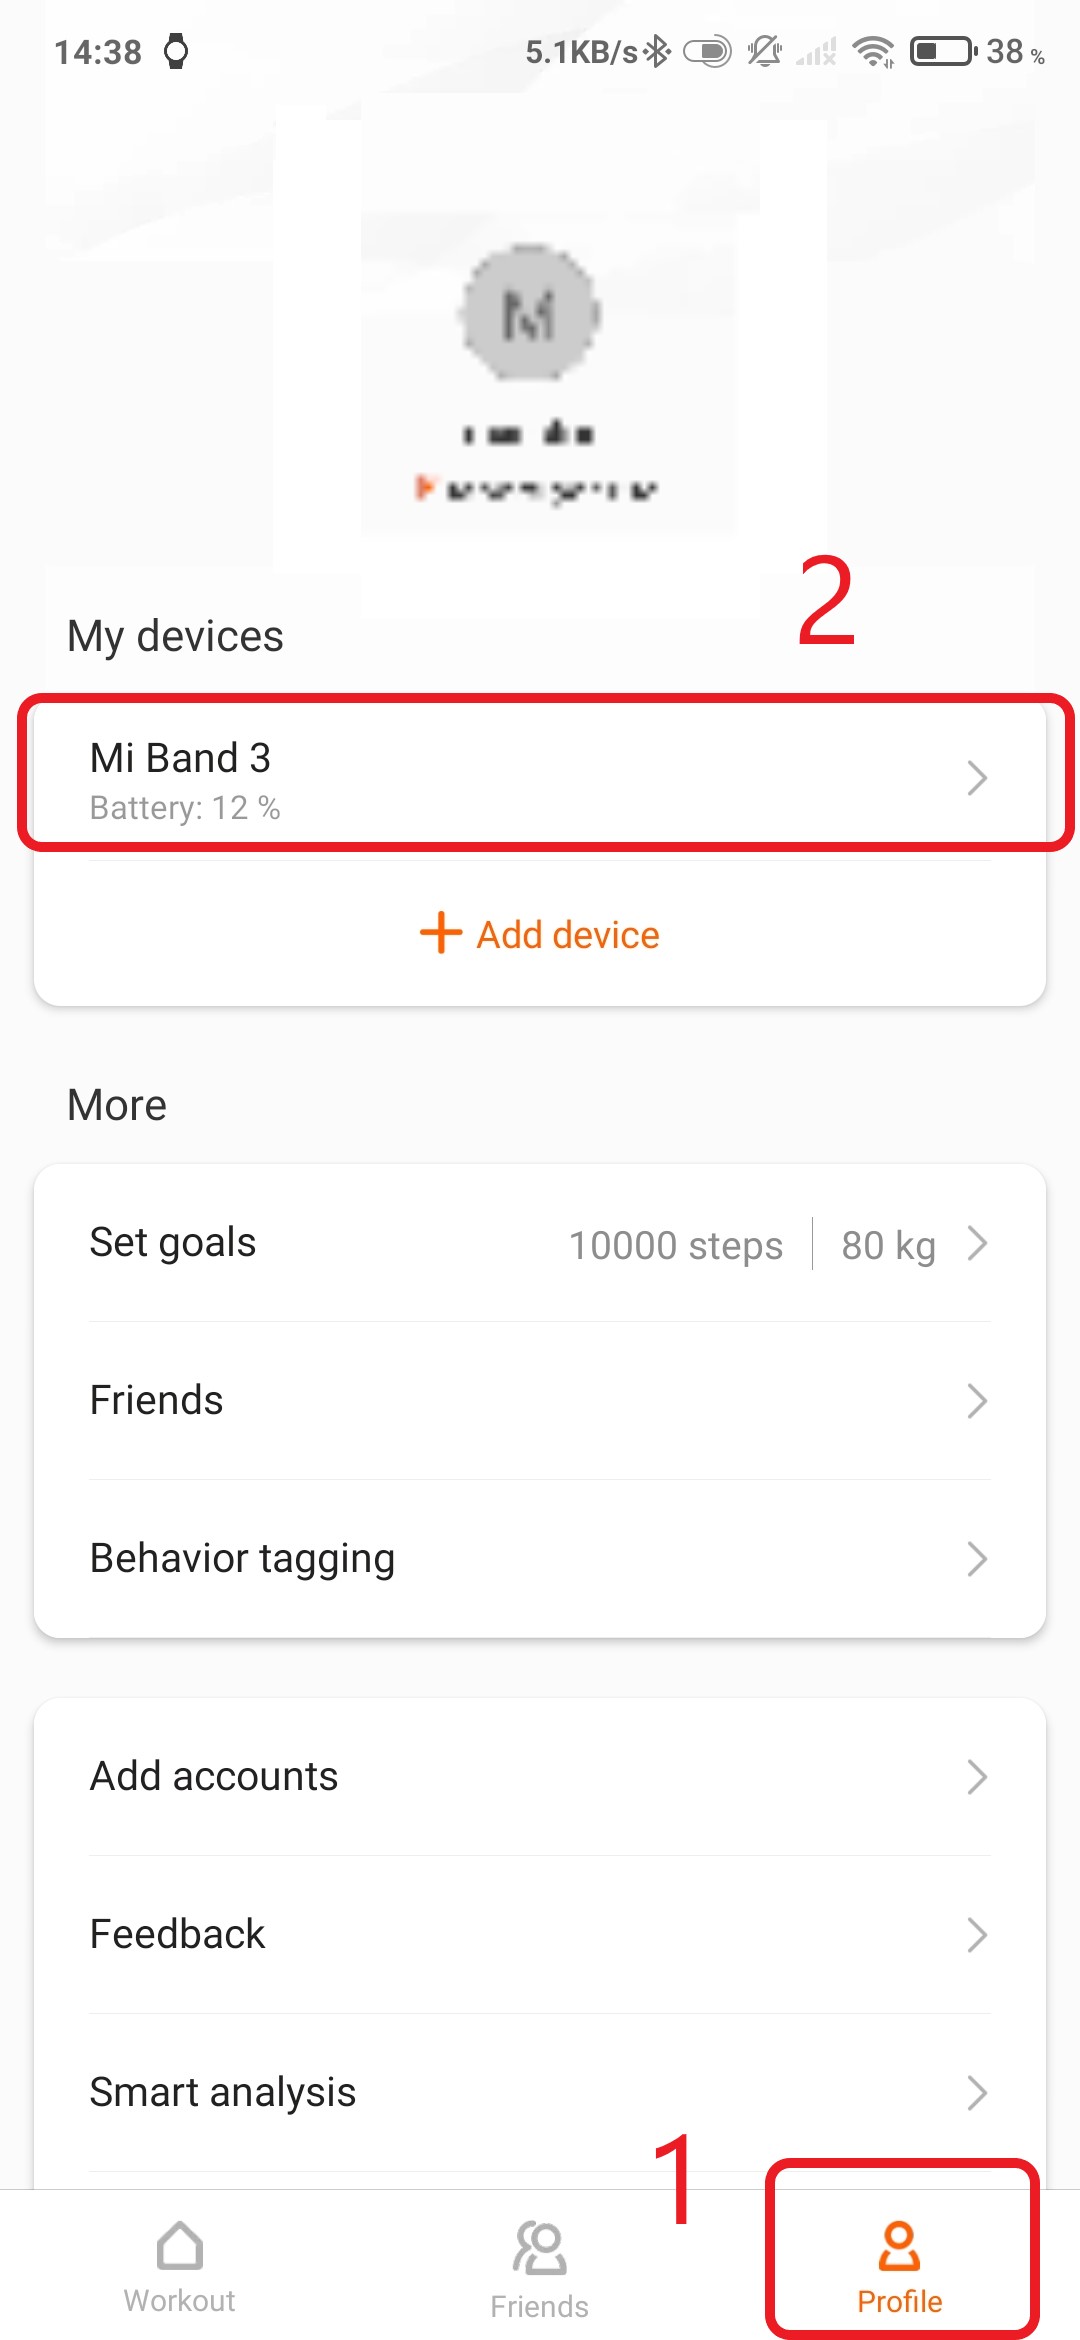
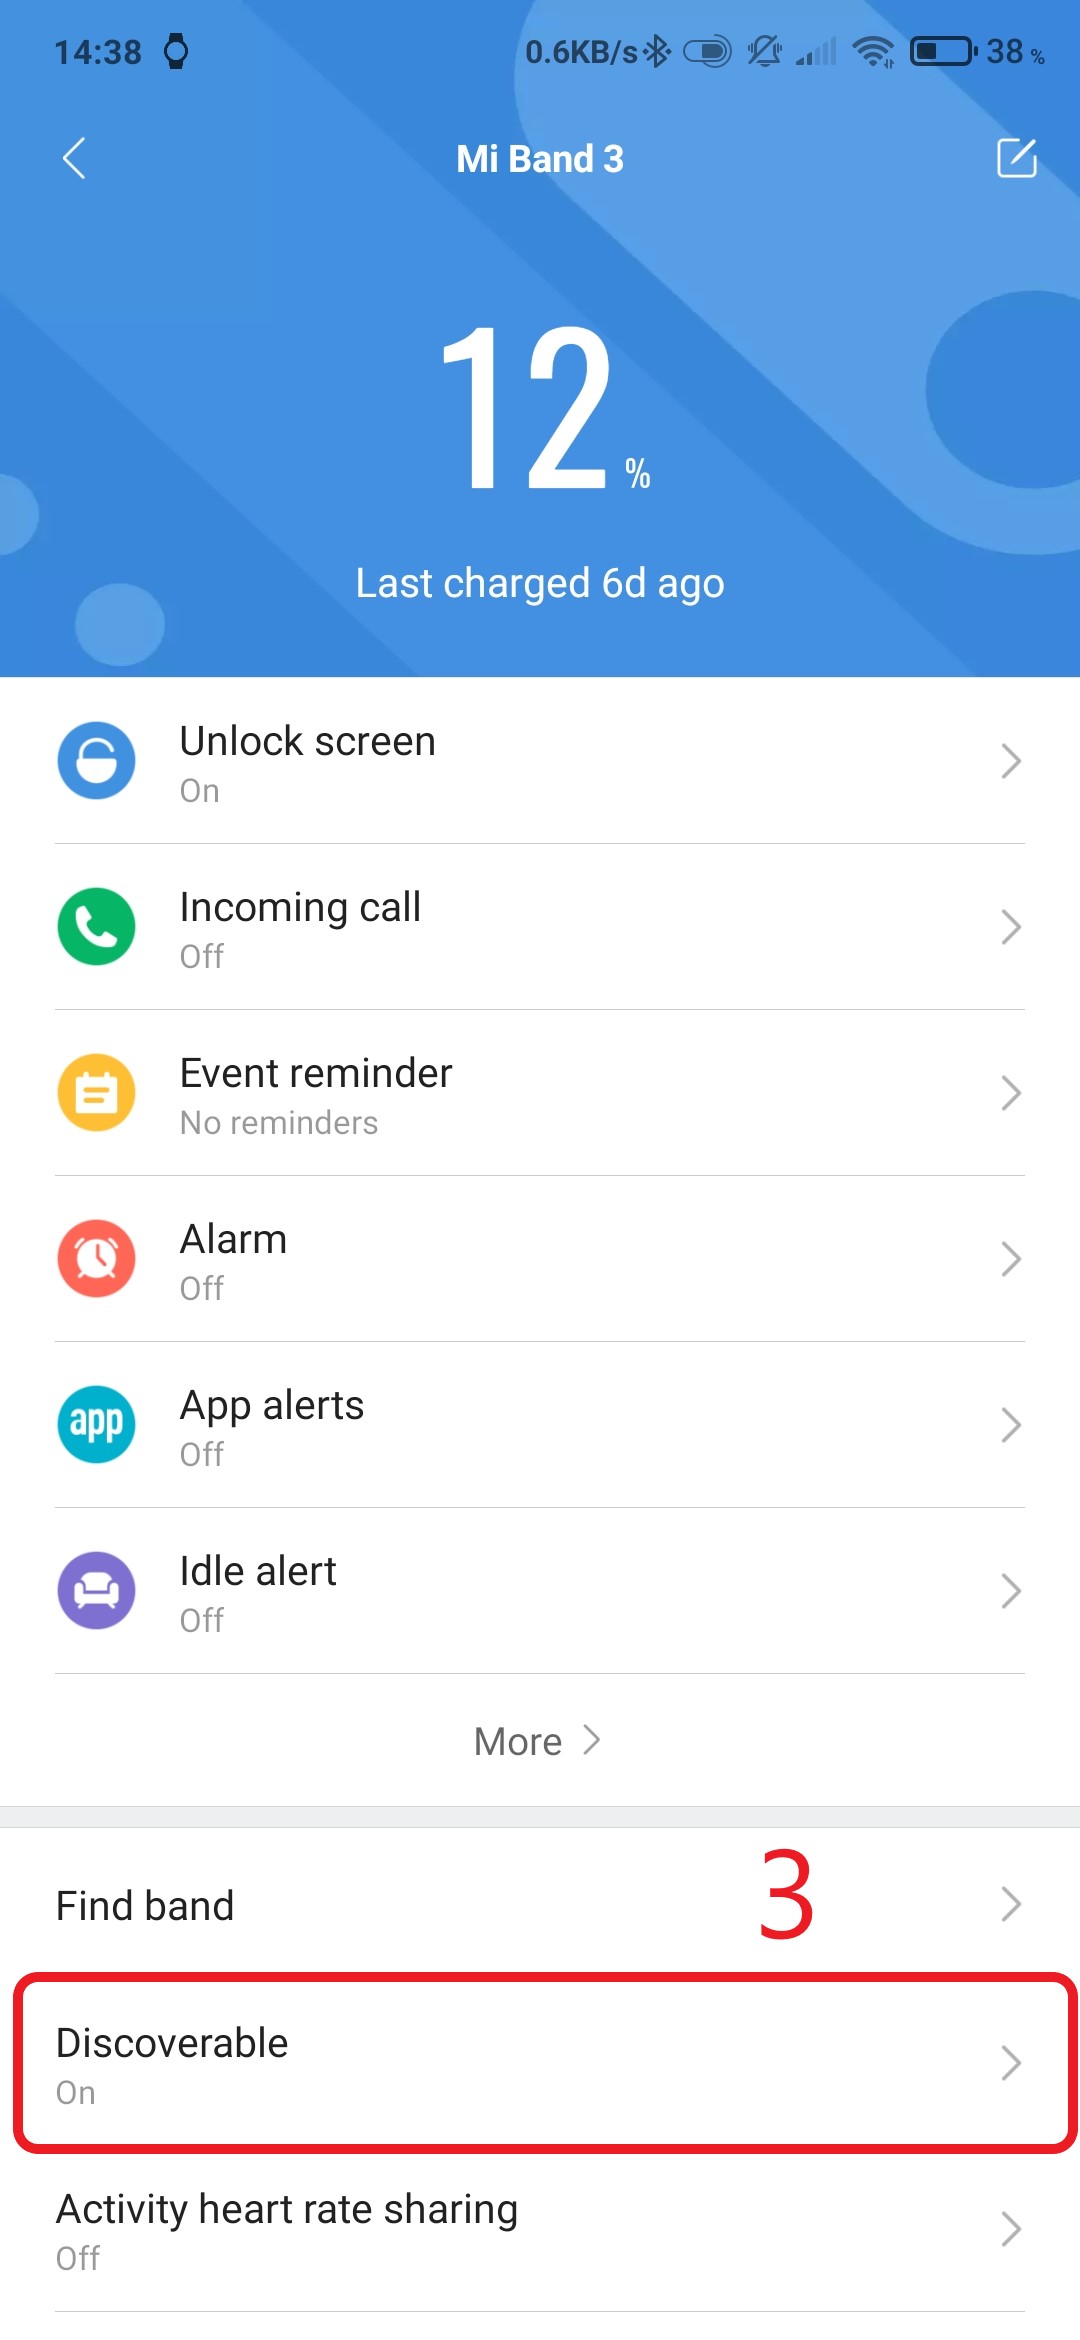
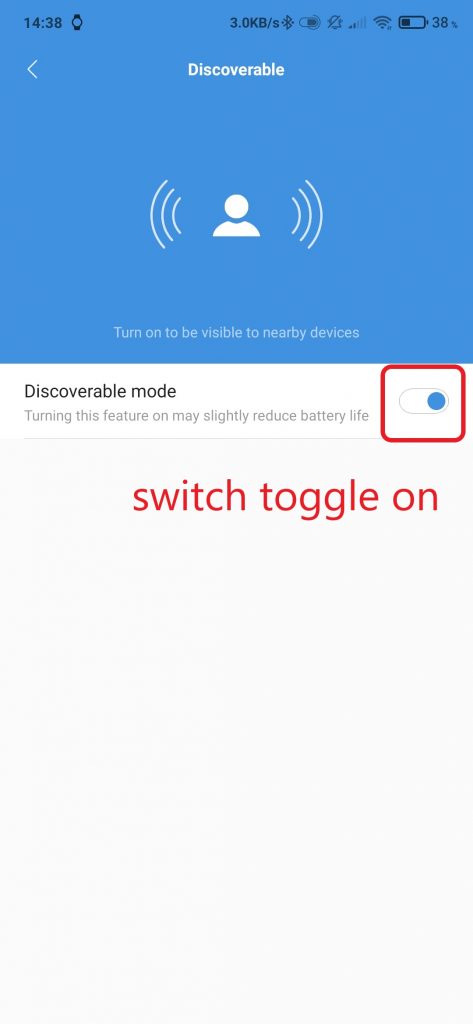
Each device might have a specific device setting to enable discoverability, just look around.
Then, you must find out what your device “MAC address” is. It’s a uniquely identifying ID that we will use as a key to identify your personal device. To obtain it, either :
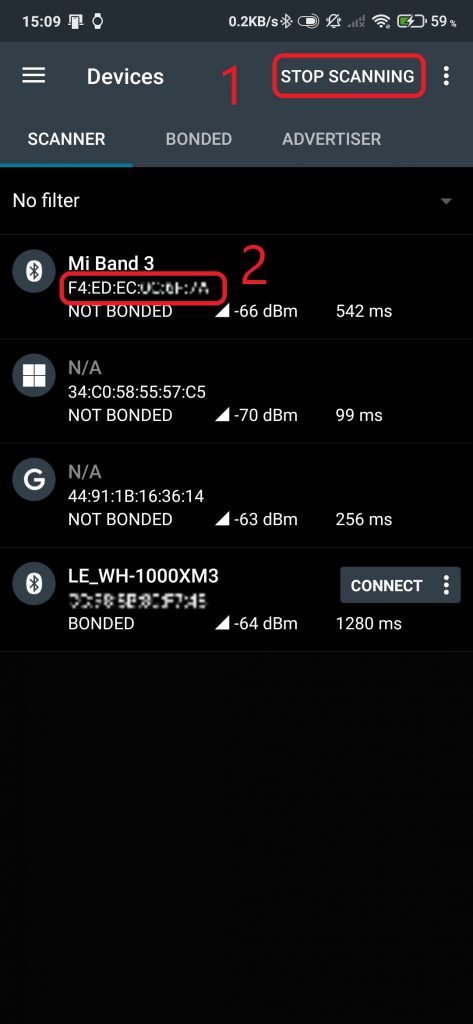
• use an app such as NRF connect, scan for BLE devices and copy the MAC address (copy letters in lower case !!) :
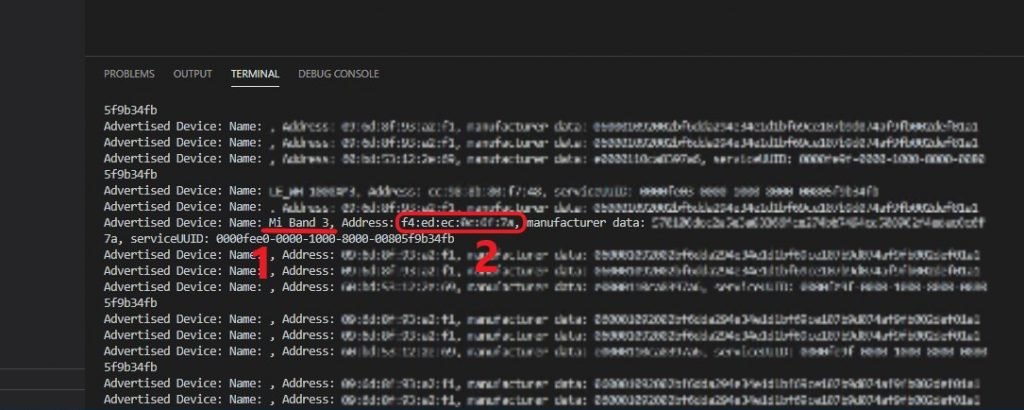
• use an Arduino scanner code on your ESP32 and get your mac address (if you never configured an Arduino IDE then, check out the next section) :
#include <Arduino.h>

#include <BLEDevice.h>
#include <BLEUtils.h>
#include <BLEScan.h>
#include <BLEAdvertisedDevice.h>

int scanTime = 5; //In seconds
BLEScan* pBLEScan;

class MyAdvertisedDeviceCallbacks: public BLEAdvertisedDeviceCallbacks {
    void onResult(BLEAdvertisedDevice advertisedDevice) {
      Serial.printf("Advertised Device: %s \n", advertisedDevice.toString().c_str());
    }
};

void setup() {
  Serial.begin(115200);
  Serial.println("Scanning...");

  BLEDevice::init("");
  pBLEScan = BLEDevice::getScan(); //create new scan
  pBLEScan->setAdvertisedDeviceCallbacks(new MyAdvertisedDeviceCallbacks());
  pBLEScan->setActiveScan(true); //active scan uses more power, but get results faster
  pBLEScan->setInterval(100);
  pBLEScan->setWindow(99);  // less or equal setInterval value
}

void loop() {
  BLEScanResults foundDevices = pBLEScan->start(scanTime, false);
  Serial.print("Devices found: ");
  Serial.println(foundDevices.getCount());
  Serial.println("Scan done!");
  pBLEScan->clearResults();   // delete results fromBLEScan buffer to release memory
  delay(120*1000);
}
Setting up Arduino IDE (with Platform.io)
There is nothing simpler than configuring an IDE to program on an Arduino. Just follow this guide. The only change will happen when it asks you to select a board :
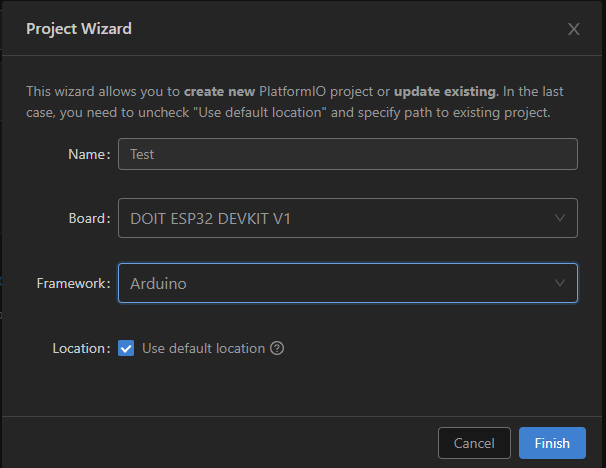
Just select your ESP32 board.
Don’t forget to customize your “platformio.ini” file with the right serial port (on windows, go in device manager to find out your COM port. Otherwise google is your friend). It should look like this :
[env:esp32doit-devkit-v1]
platform = espressif32
board = esp32doit-devkit-v1
framework = arduino
;upload_port = COM3
upload_speed = 921600

monitor_speed = 115200

board_build.partitions = huge_app.csv
If you download the Github repository (at the end of the tutorial), you should not have to set it up (except if you have multiple COM ports open).
Setup IFTTT and Yeelight services
Next up, we will need to set up the webhooks service of IFTTT. If you have not yet created an IFTTT account, do it. The, you will need to set up the webhooks service. IT is a service available to individual users to trigger an event on ifttt or to receive an ifttt action on a server. We will use the first feature. To do this, you will later need your personal webhooks URL (with your own key in it). You will find it in your webhooks settings :
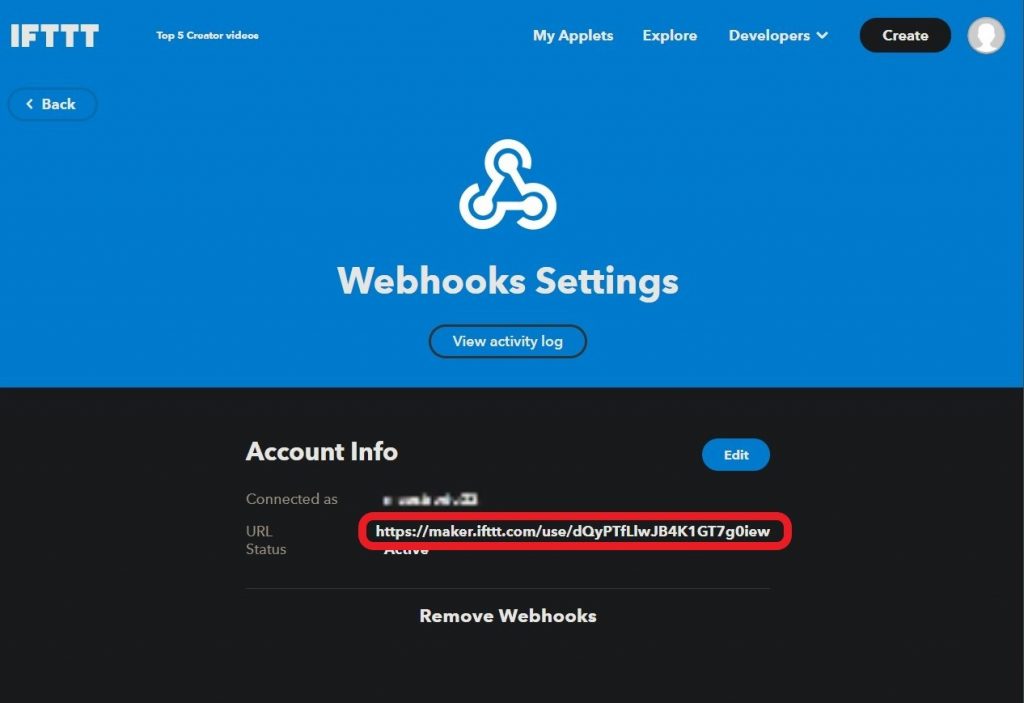
Here, the key to write down would be : dQyPTfLlwJB4K1GT7g0iew . Do not share it with anyone (I have renewed it since I took this screenshot) !
Next, to setup your Yeelight, once you have followed the normal setup, go to your IFTTT Yeelight page and follow the linking process.
Create IFTTT applet
IFTTT works on a simple principle. If you have ever touched any programming language, you must be familiar with control structures (while, for, if/then, …). IFTTT takes he simplest one (if / then) and apply it to the internet of things. It is all in the name : IF This Then That. A service triggers an action (called an applet) and activate an action of another service. Almost any connected device has an IFTTT action/trigger. Let’s create ours !
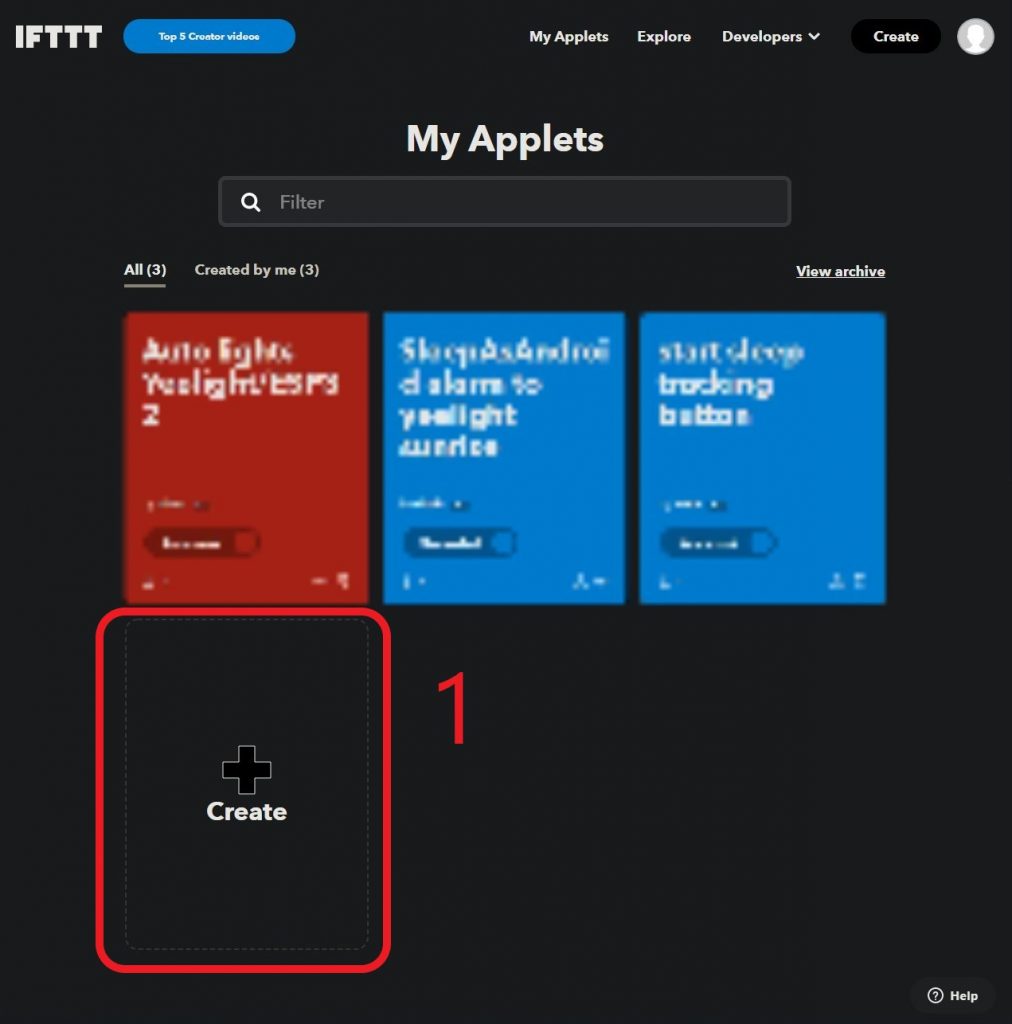
Go to your applets. Click the create applet (+ button) :
Now we have to create a trigger :
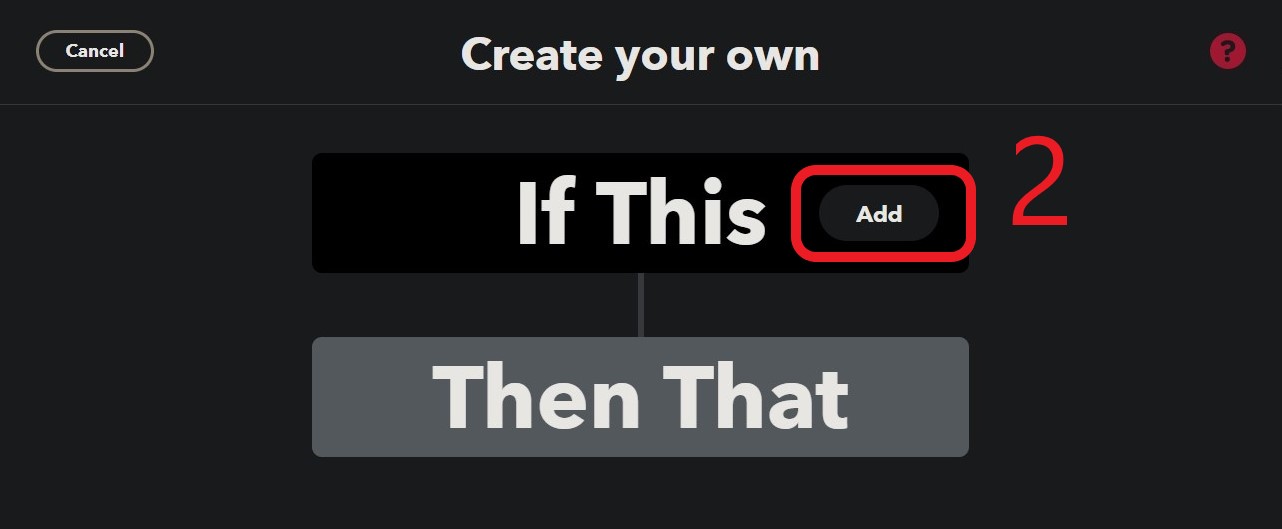
2) add trigger 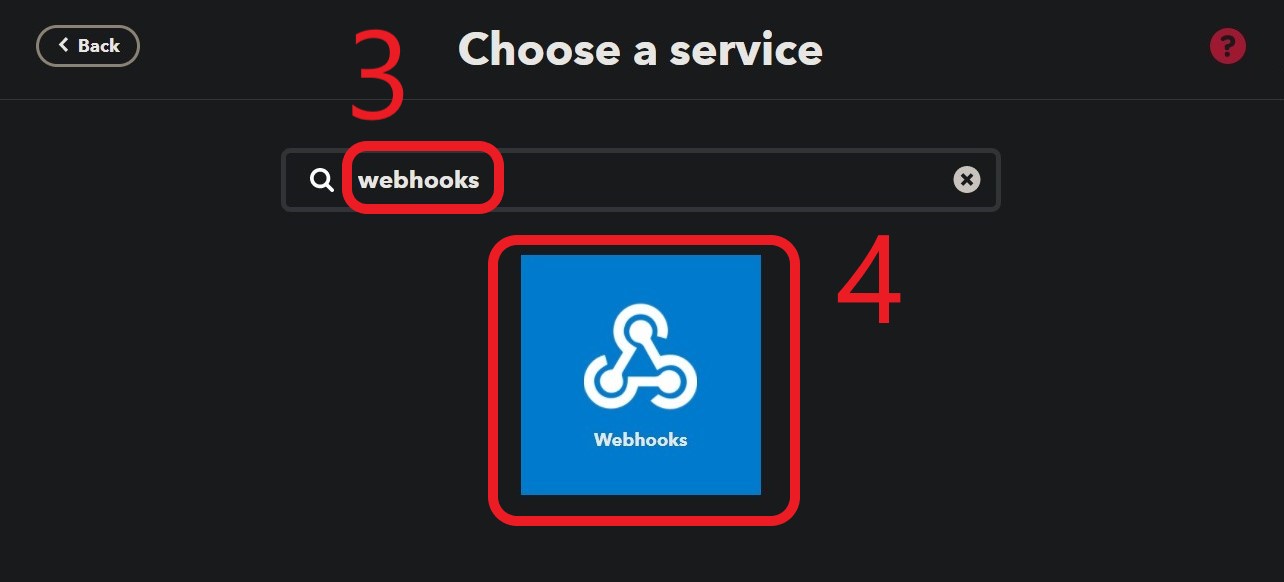
3) search the webhooks trigger – 4) click the webhooks trigger 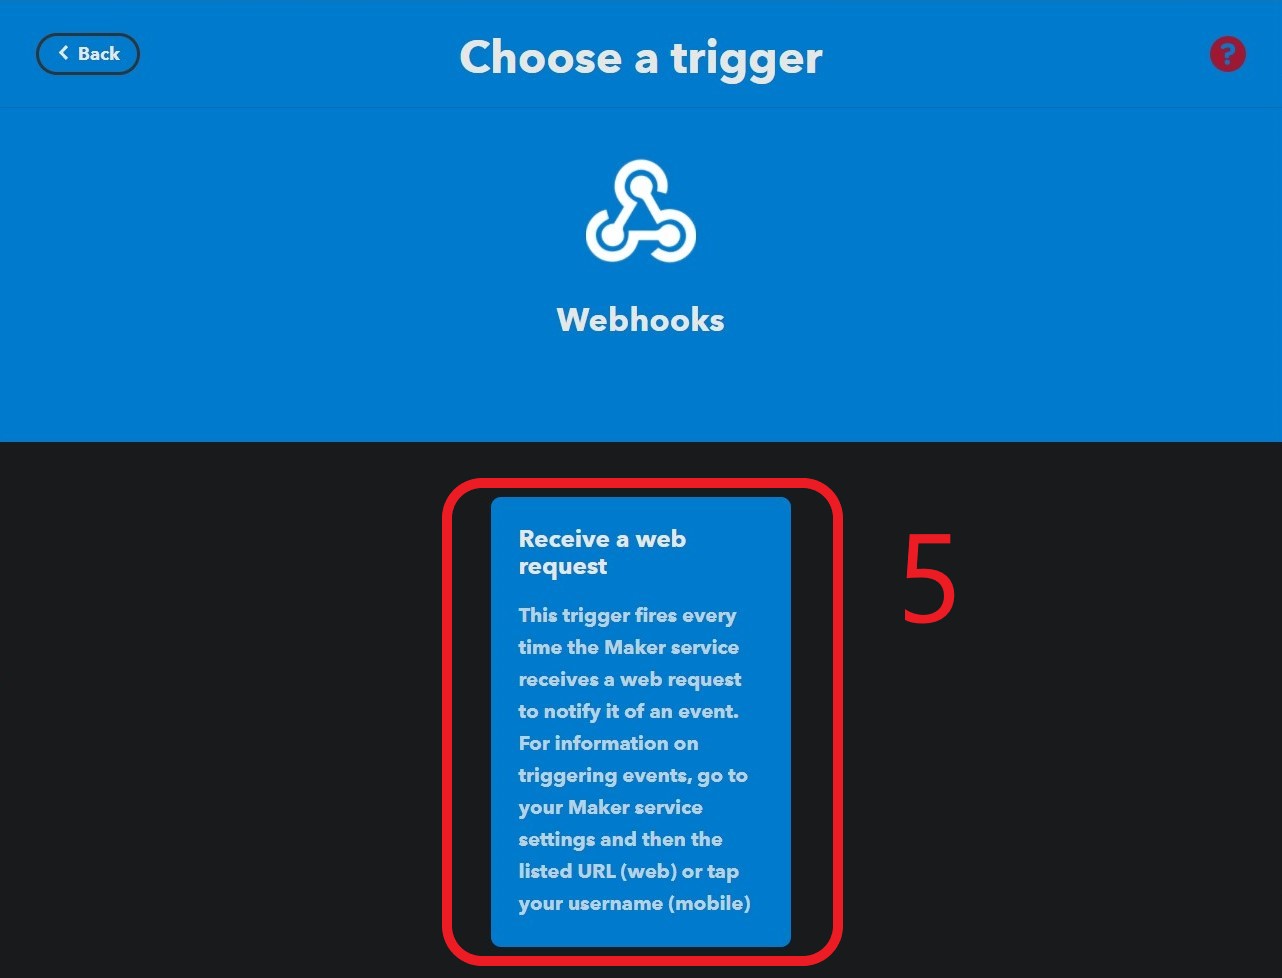
5) click on “receive a web request” 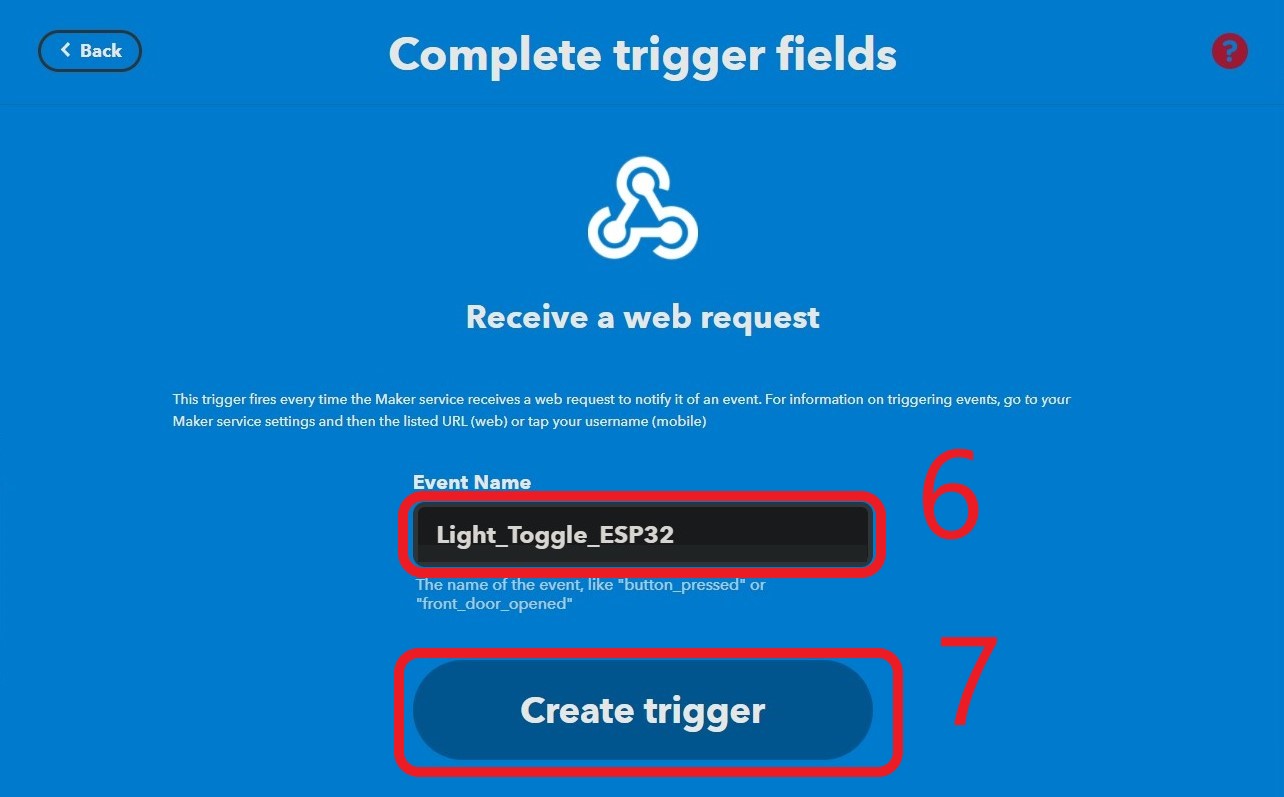
6) enter your event name 7) create the trigger
The event name will be used on our program to call this specific trigger and not another (in combination with your unique API key). If you do not want to have to modify the code later on, just reuse “Light_Toggle_ESP32”
Then, we must setup the action we want to associate with our trigger :
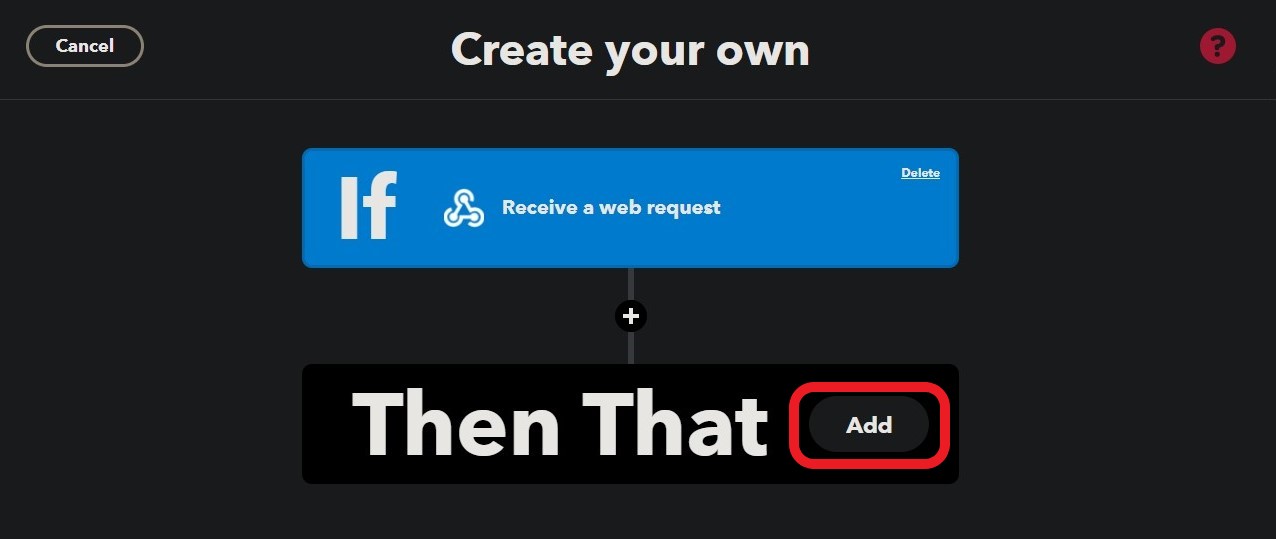
add a trigger 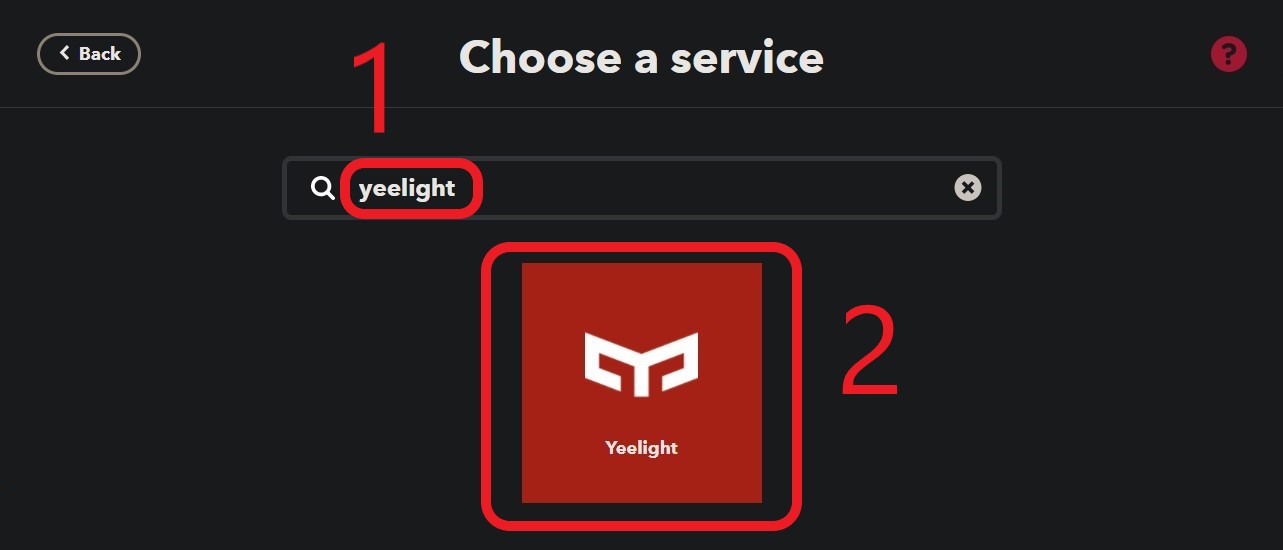
1) search the Yeelight triggers 2) click on the service 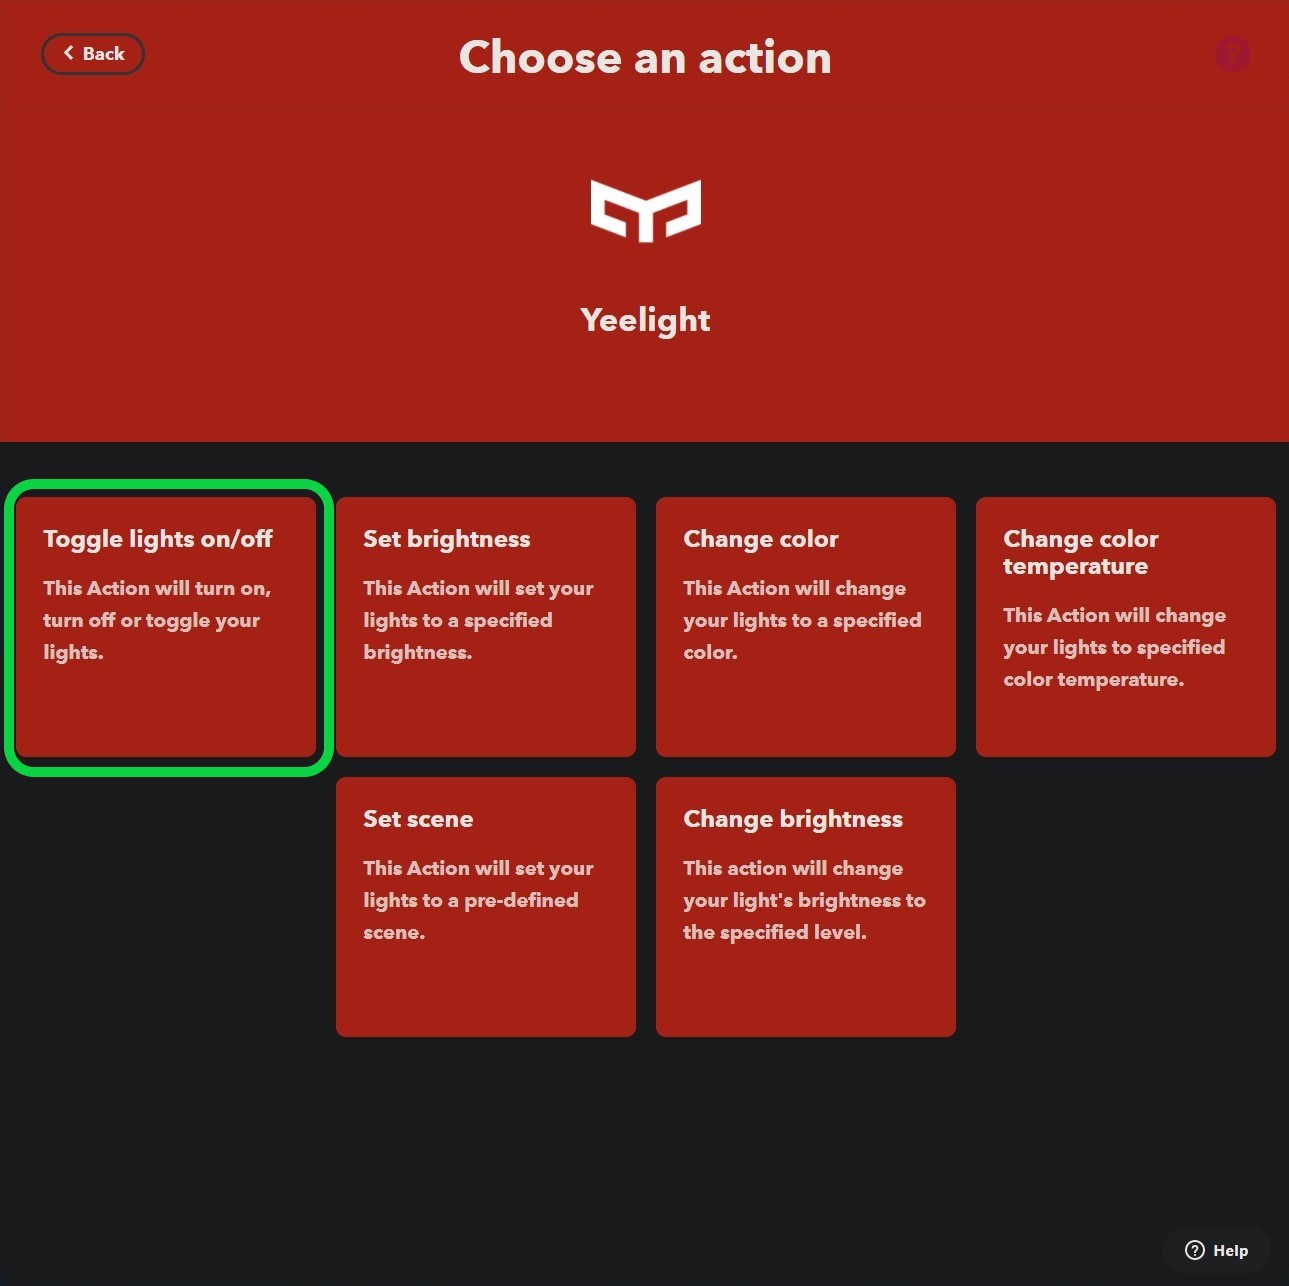
choose the “toggle ligths on/off” action 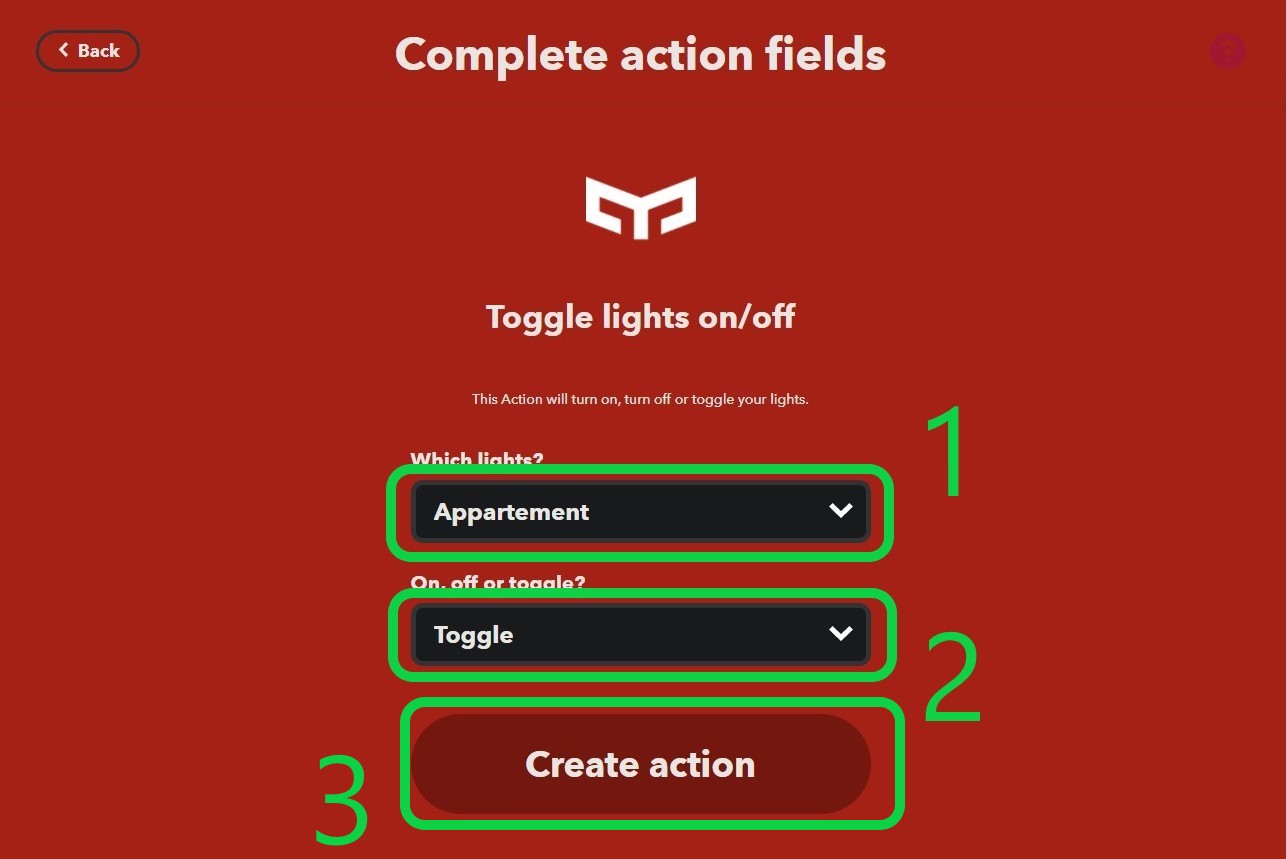
1) select your ligth (or group) 2) select toggle as an action 3) create action 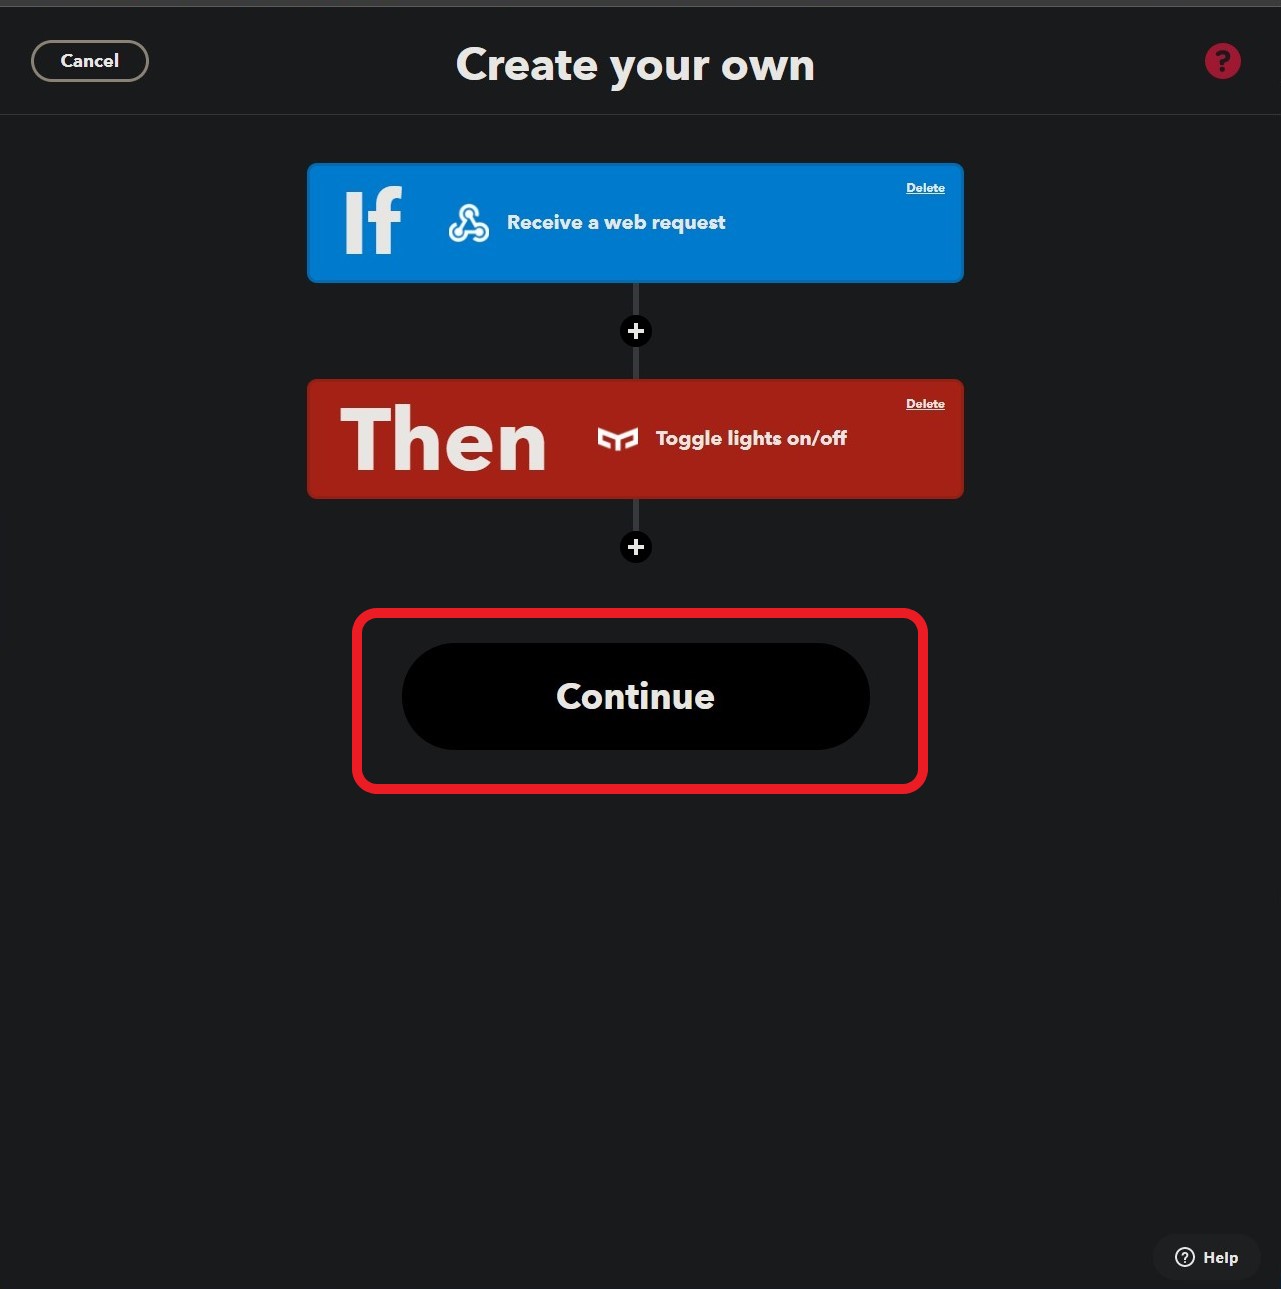
validate and create your IFTTT applet
Give a name to your applet and you are done. Every time you call https://maker.ifttt.com/trigger/Light_Toggle_ESP32/with/key/YOUR_KEY
Uploading the program to your ESP32
Now that your platform.io environnement is setup and IFTTT is ready, we have to compile and upload the program to your ESP32. Download the code from its repository and save it wherever you’d like :
Once you have the right files, open the unziped folder in VisualStudio Code. Go to src/main.cpp and fill these lines :
String macAddress = ""; // bluetooth MAC address of key device

const char* ssid = ""; // ESP32 Wifi SSID (your Wifi network name)
const char* password = ""; // ESP32 WIFI Password (your Wifi password)

String eventNAME = "Light_Toggle_ESP32"; // Your IFTTT webhooks url
String webhooksKEY = ""; // Your IFTTT webhooks key
All lines are pretty self-explanatory. Don’t let anyone now these. They are important security information. Now, just upload your main.cpp to the ESP32 by clicking on the arrow on the left bottom corner :

You can also check out what the ESP32 is pushing to your terminal by clicking here :

Try placing your Bluetooth device into a metal object (a stove for exemple) … your lights should magically turn off 😉. Get it out and they will light up almost instantaneously.
I hope you found this tutorial useful and will play with it. Check ou the full code :